 Office Solutions Pro
Copy SharePoint list items and attachments with Power Automate
Create a destination list from an existing list, map common fields, and copy each item’s attachments using the correct source and destination identifiers.
On this page
- Overview
- Before you begin
- 1. Create the empty destination list
- 2. Create a manual flow and retrieve source items
- 3. Create one destination item for each source row
- 4. List the source item’s attachments
- 5. Read and write each attachment
- 6. Save, inspect warnings and test once
- 7. Reconcile destination rows and files
- Troubleshooting
Copying a list’s structure and copying its content are separate tasks. SharePoint’s From existing list option creates the columns, views and formatting. A Power Automate flow then creates destination items and transfers their attachment files.
This tutorial covers a one-time, same-site copy of current values in common fields and list-item attachments. It creates new items, so it does not preserve the original item IDs, item-version history, Created/Modified audit values, comments, individual sharing permissions or every advanced column type. It is not a full-fidelity backup or a continuous synchronization flow. Keep the source until you have reconciled the copy.
Before you begin
Use a generic SharePoint Online source list and a test destination on the same site. The SharePoint connector does not support every custom list template. You need permission to read the source items and attachments, create the destination list, and add items and attachments there. The flow connection must have the corresponding access; being able to open a site does not prove it can perform each operation.
The SharePoint connector is Standard. Eligible Microsoft 365 Power Automate standard-connector rights can support this design. For an instant flow, the invoking user’s licensing context applies; confirm those rights for the person running it. The actions below do not introduce a Premium connector. SharePoint connector and Power Automate licensing
Prepare a small test source with populated values in the fields you need to copy. This procedure uses single-choice and single-person columns, ordinary multiline text, a date/time, number, hyperlink URL and currency. Multi-select choices, multi-person arrays, rich-text or append-history fidelity, lookup relationships, managed metadata, Image, Location and Ratings are outside this mapping. They need separate type-specific handling, which this tutorial doesn’t cover.
The connector supports list-item attachments up to 90 MB. Confirm file sizes before starting. Copy during a period when source items and attachments will remain unchanged, and inspect destination rules or item-created flows so the copy does not send unexpected notifications. Connector limits and supported list types
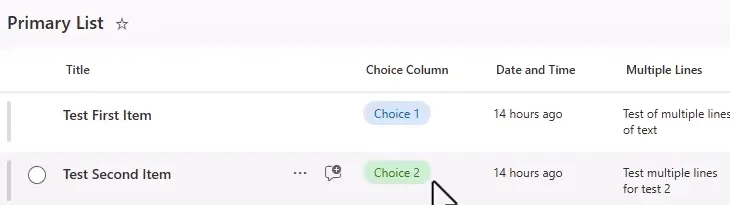
1. Create the empty destination list
- Open the destination SharePoint site and go to Site contents > New > List. Select From existing list.
- Choose the site containing the source list, select that list and select Next.
- Name the new list Backup List. Add a description if useful. Clear Show list in site navigation if you want the same navigation choice illustrated here; this affects navigation, not access.
- Select Create and open the new list. Confirm that it has the expected columns and is empty.
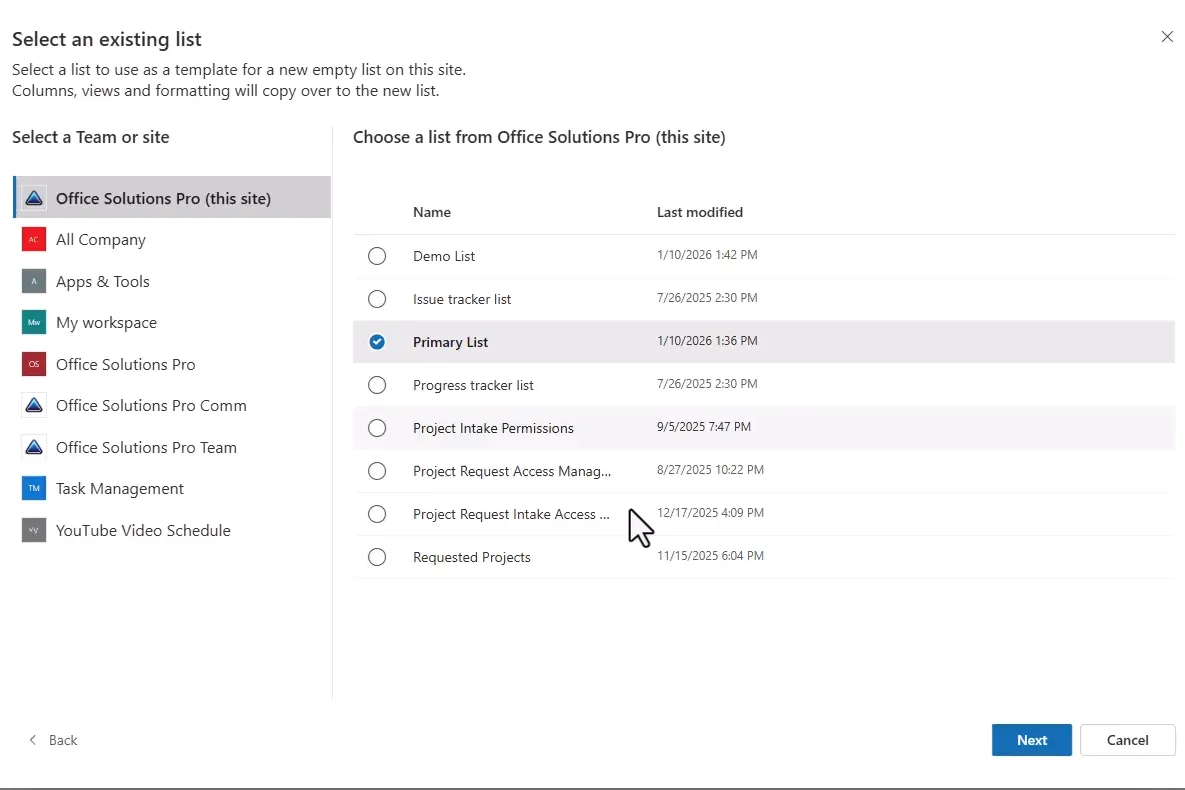
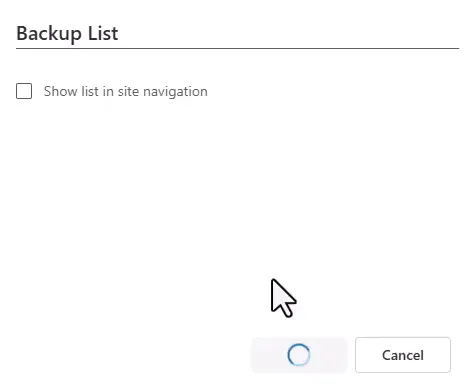
From existing list copies structure, not the original items or attachment content. It also has limits: a source with more than 80 list views cannot be used this way, and only the first two automated rules are included. Confirm the new list’s settings and rules instead of assuming every customization was cloned. If the destination cannot be created with this option, establish a matching supported schema before building the flow. Create a list from an existing list
Confirm that the destination supports attachments: open its New item form and look for Add attachments, then close the form without saving. If the command is missing, stop and have the list owner configure an attachment-capable destination before building the attachment writes. A custom form may require the owner to inspect the underlying list settings. Add list items and attachments
2. Create a manual flow and retrieve source items
- In Power Automate, select Create > Instant cloud flow.
- Name it Create Backup List Item, select Manually trigger a flow, then Create. If you start with a blank designer, add that trigger explicitly.
- Add SharePoint — Get items. Select the source Site Address and source List Name, called Primary List in the example. Use Get items for list rows, rather than Get files or the single-row Get item action.
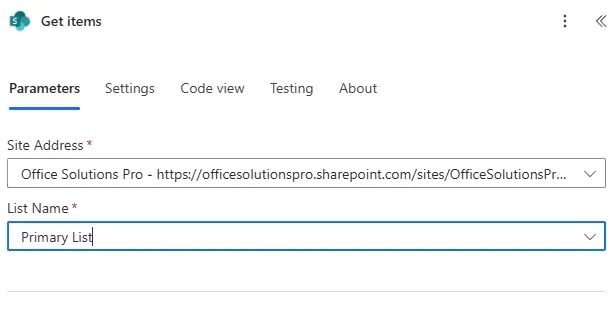
Set a retrieval capacity before copying
Configure the item count explicitly. For this small-list procedure, expose Top Count under Advanced parameters and set it to 5000. On Get items’ Settings tab, enable Pagination and set Threshold to 5000. Keep the source within that capacity and compare actual retrieved rows with the expected source count.
Microsoft’s Get items guidance describes a default limit of 100. Microsoft 365’s Low performance profile permits up to 5,000 paginated items and 5,000 inputs to Apply to each. These settings do not make an arbitrarily large list fit into one reliable copy run. If the expected count exceeds capacity, or you hit a list threshold, stop and design partitioned retrieval and reconciliation before copying. Get items guidance and flow limits
For an optional payload reduction, use Limit Columns by View with a view that contains every field you map and the source ID. This controls returned columns; it does not filter which items are copied or increase the row limit. Leave it unrestricted for the initial small test if you have not prepared that view.
3. Create one destination item for each source row
Add Control — Apply to each and choose the value array from Get items. The new designer may label the loop For each. If choosing a Get items token automatically creates this loop, use that loop and verify its input; do not nest another item loop accidentally. Keep the default sequential execution for the initial copy.
Inside the outer item loop:
- Add SharePoint — Create item.
- Select the destination Site Address and Backup List.
- Expand the relevant Advanced parameters. In each field, open Insert dynamic content with the lightning-bolt button or
/, then choose its value from Get items, not from Create item. - For Choice and Person fields that initially offer a dropdown, choose Enter custom value when needed so you can insert the dynamic token.
- Fill the mapped fields below. Select the actual tokens; typing a token’s label as plain text does not insert its value.
| Create item field | Token from the current Get items row |
|---|---|
| Title | Title |
| Choice Column Value | Choice Column Value |
| Date and Time | Date and Time |
| Multiple Lines | Multiple Lines |
| Person Claims | Person Claims |
| Number | Number |
| Hyperlink | Hyperlink |
| Currency | Currency |
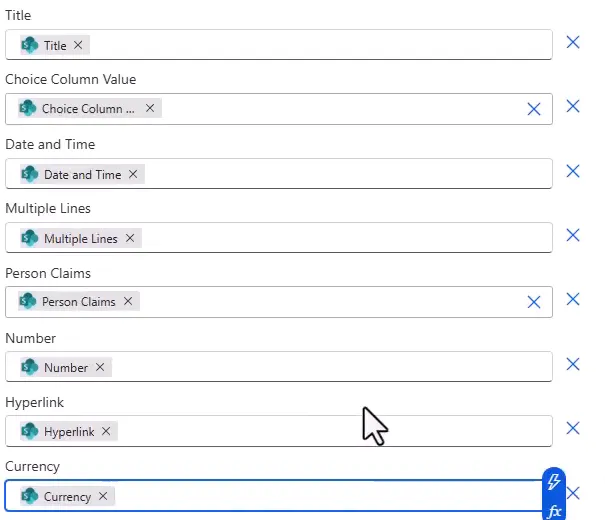
Use the Person Claims value, rather than a display name. This same-site example assumes that the person resolves in the destination. A different site or tenant can require identity and lookup remapping; do not extend the procedure by changing only the site address without validating those dependencies.
For the hyperlink, this mapping transfers the URL value; it does not promise the original friendly description. Preserve original date/time values in the action rather than converting them to display text. The destination’s regional settings can change how they appear.
Map any other required destination fields deliberately. Do not populate an extra field with a guessed default just to make the action save. Leave optional parameters that are outside the intended copy unselected, and do not pass a source Content Type ID into a different destination schema without a verified mapping. This tutorial uses the destination’s matching default item type.
4. List the source item’s attachments
After Create item, still inside the outer item loop, add SharePoint — Get attachments:
| Parameter | Value |
|---|---|
| Site Address | Source site |
| List Name | Primary List |
| Id | ID from Get items, for the current source row |
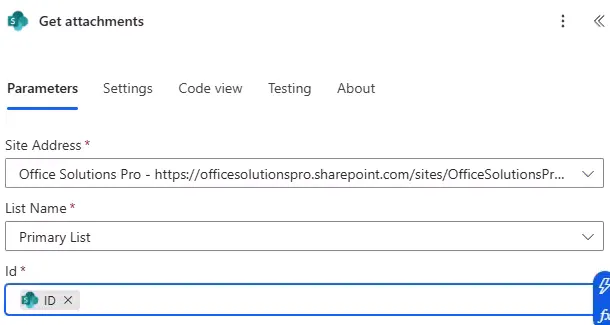
Get attachments returns attachment metadata. It does not return the actual file bytes. The next action retrieves those bytes. Keep the source item ID separate from the ID that Create item assigned to the destination row. Attachment actions
5. Read and write each attachment
Add another Apply to each inside the outer loop, after Get attachments. Use Body from Get attachments, its array of attachment records. Selecting an attachment token may create this inner loop automatically; verify that it uses this array, not the Get items array again.
Inside the inner attachment loop, add SharePoint — Get attachment content:
| Parameter | Value |
|---|---|
| Site Address | Source site |
| List Name | Primary List |
| Id | ID from Get items — the current source item |
| File Identifier | Id from Get attachments — the current attachment |
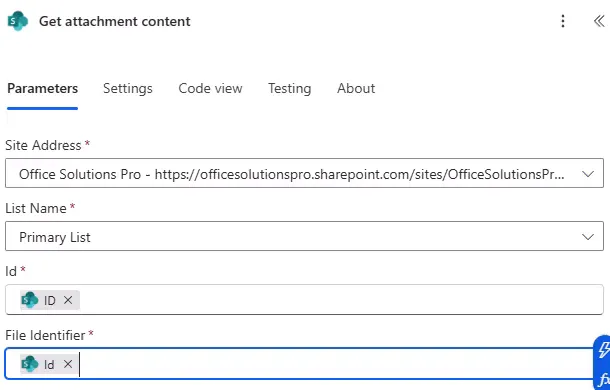
The connector describes the attachment’s Id token as its File identifier. Do not substitute the item’s numeric ID, the attachment’s DisplayName or its AbsoluteUri for this field.
Next, in the same inner loop, add SharePoint — Add attachment:
| Parameter | Value |
|---|---|
| Site Address | Destination site |
| List Name | Backup List |
| Id | ID from Create item — the new destination item |
| File Name | DisplayName from Get attachments |
| File Content | Attachment Content from Get attachment content |
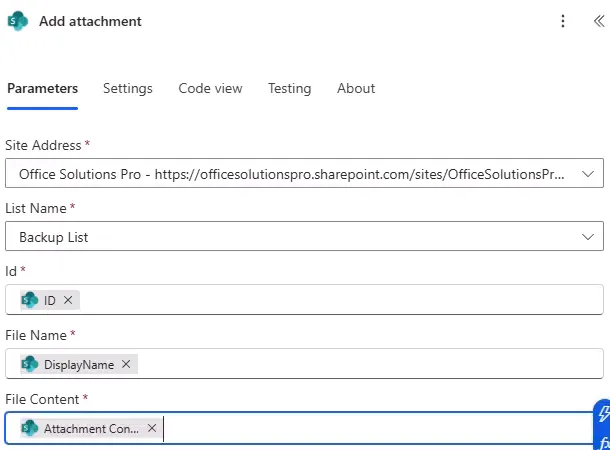
Keep Add attachment’s Run after set to a successful Get attachment content. Do not continue after a failed or skipped content retrieval with an empty or substituted payload. File Content is the binary output, not a URL or the filename. Get attachment content and Add attachment parameters
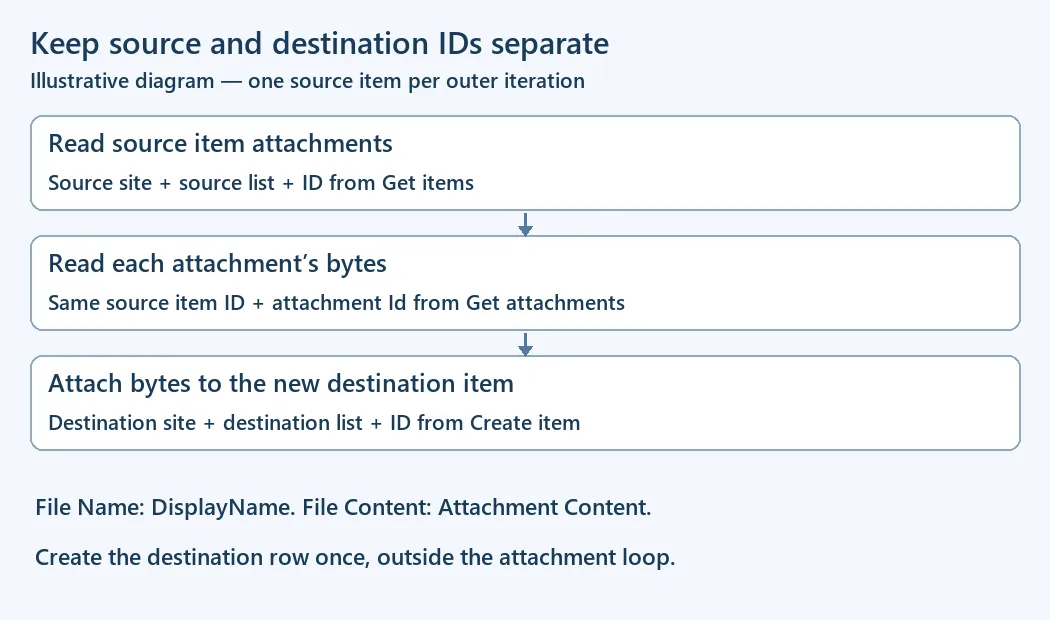
Illustrative diagram: read from the source row and write to the new row returned by Create item.
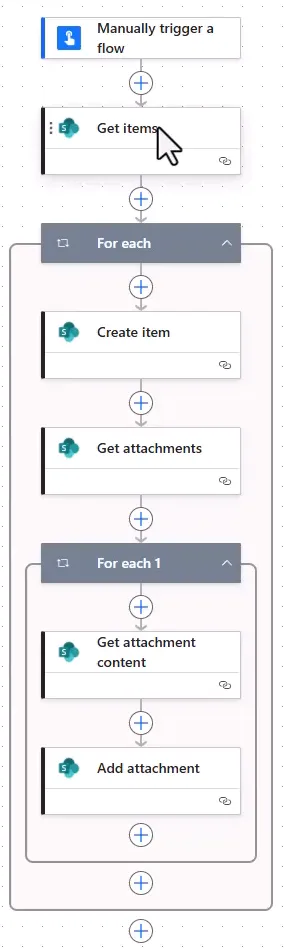
The completed structure is:
- Manual trigger.
- Get items.
- Outer loop over source rows: Create item, then Get attachments.
- Inner loop over that row’s attachments: Get attachment content, then Add attachment.
Create item belongs outside the attachment loop, so a row with several attachments is created once. An item with no attachments still has its destination row; the empty attachment array gives the inner loop nothing to process.
6. Save, inspect warnings and test once
Every run creates new destination rows. There is no duplicate detection, source-to-destination checkpoint or update-existing-item path. A failed run can leave partially copied items. Before retrying or resubmitting, inspect the destination and decide how to reconcile it; do not rerun blindly against completed copies. Use a disposable test destination for repeated development tests.
- Select Save. For a solution-aware flow in the new designer, follow Save draft with Publish so the changes are runnable.
- Open Flow checker and resolve errors. Inspect warnings before running.
- A warning about no limiting folder, Filter Query or Top Count concerns the rows retrieved. Selecting fewer columns can reduce payload, but does not resolve that row-selection issue. Use the explicit capacity from Step 2 and ensure it covers the intended source.
- Select Test > Manually > Test, then Run flow, and Done as offered.
- Open run history. Inspect Get items’ returned count, every outer iteration, Create item’s new ID and each attachment read/write result. Confirm the overall run succeeded; a completed launch dialog alone does not establish success.
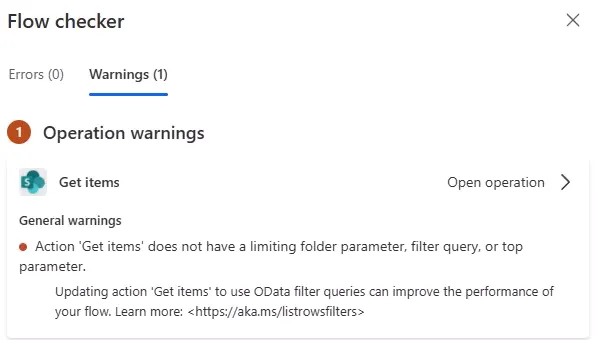
The illustrated warning comes from an unrestricted configuration. The screenshot does not replace the explicit retrieval settings above. Designer save, test and action settings
7. Reconcile destination rows and files
- Refresh Backup List. Compare the destination count with the intended source items. Check rows by a reliable business key and their field values; matching counts alone cannot detect an omitted row and a duplicate row.
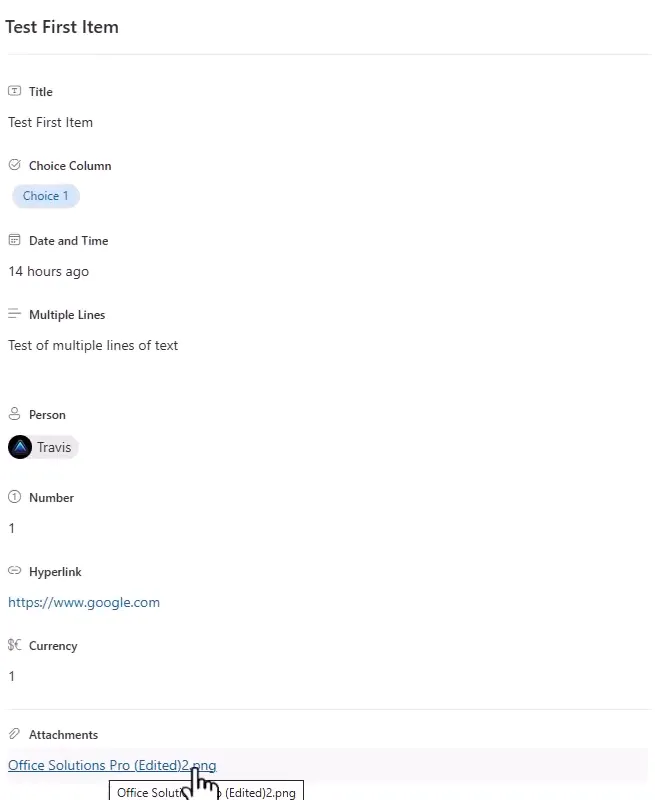
- Open copied items and compare choice, date/time, multiline text, person, numeric, currency and hyperlink URL values. Check raw date values when regional display differs.
- Compare each item’s attachment names and number of attachments. Open the copied files and compare them with the source; for critical transfers, verify file sizes or hashes as part of your reconciliation.
- Include a test row with no attachment and a row with several different attachments. Confirm files belong to the correct destination item.

The flow only implements the fields and actions you configured. It does not copy item comments, version history, historical authorship, unique permissions, retention labels, an existing Power Automate flow or a customized Power Apps form. It does not rewrite links that still point to the source site. Review destination access, rules, versioning and content approval settings for their intended behavior; these new writes may trigger other automations or create pending items when approval is enabled.
Keep the source intact until the owner accepts the reconciliation and any preservation requirements. Retiring or deleting it is a separate action; this flow contains no deletion step.
Troubleshooting
| Symptom | Inspect and correct |
|---|---|
| Only the first part of the source appears | Check Get items’ actual count, Top Count, pagination and flow capacity; stop if the source exceeds the supported run design |
| A choice or person field fails | Confirm single-value types, actual choice values and the current row’s Claims token; resolve the person in the destination |
| An attachment lookup returns not found | Use the source site/list and source row ID for both reads, with the attachment Id token for File Identifier |
| Attachments land on the wrong row | Change Add attachment’s Id to the ID returned by Create item for this outer iteration |
| A row is created once per attachment | Move Create item outside the inner attachment loop and inspect loop inputs |
| Attachment writes fail | Confirm destination attachments are enabled, permission to add, supported size and binary Attachment Content mapping; inspect the actual action error |
| New copies appear after every test | Create item always inserts; reconcile existing partial/completed copies before another run |
| An advanced column is empty | It is outside this field map; use a separately validated type-specific migration approach before treating the copy as complete |
Download the action and token mapping guide to keep the three identifiers and their dynamic-content sources clear while building.
Companion video
Video: Duplicate a SharePoint List in Minutes | Including ATTACHMENTS!!
If the player is blocked on your network, open the video on YouTube.
Need help applying this to your own setup? Read about consulting.