 Office Solutions Pro
Build a Netflix-style video library in SharePoint
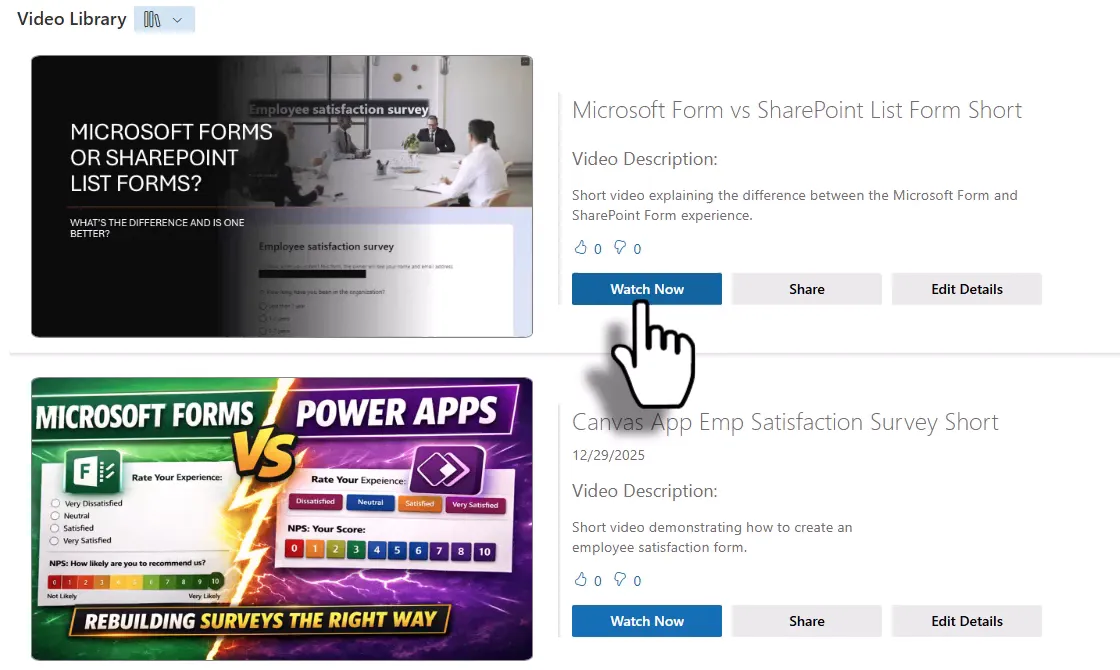
Turn a SharePoint document library into a card-style video library with thumbnails, descriptions, likes, and Watch Now, Share, and Edit Details buttons, using JSON view formatting.
A SharePoint document library can store training videos perfectly well, but the default view is a plain file list. With a few columns and a block of JSON, the same library can display each video as a large card with a thumbnail, title, description, and buttons.
You keep everything a document library already offers, including sharing and permissions. No Power Apps or custom code are involved. View formatting does not change the data in list items; it only changes how they are displayed.
The finished view looks like this:
Before you begin
Have these ready:
- SharePoint Online. View formatting is supported only in SharePoint Online.
- Permission to create a library and to create and manage views on the site.
- A few video files to test with, and one thumbnail image for each.
- A decision on who may use Like and Dislike. These buttons save only for people who can edit items in the library, as explained in Step 7.
- The JSON file: video-library-view.json.
1. Create the library
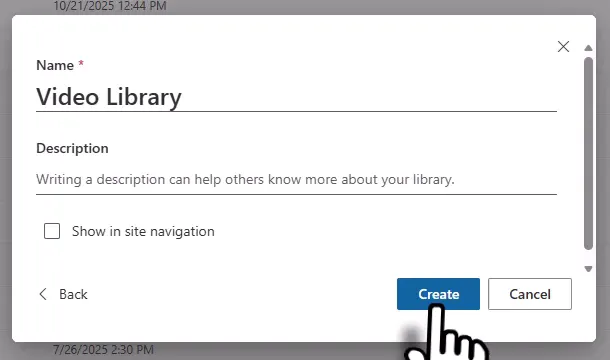
- On the site, go to Site contents and select New > Document library, then choose a blank library.
- Name it, for example
Video Library. - Clear Show in site navigation if you would rather add the link later.
- Select Create.
2. Add the built-in columns to the view
The JSON reads several built-in columns, so they need to be in the view.
- Hide Modified and Modified By if you do not want them in your editing view.
- Open the view menu and select Edit current view.
- Under Columns, select Title and Created By.
- Select OK.
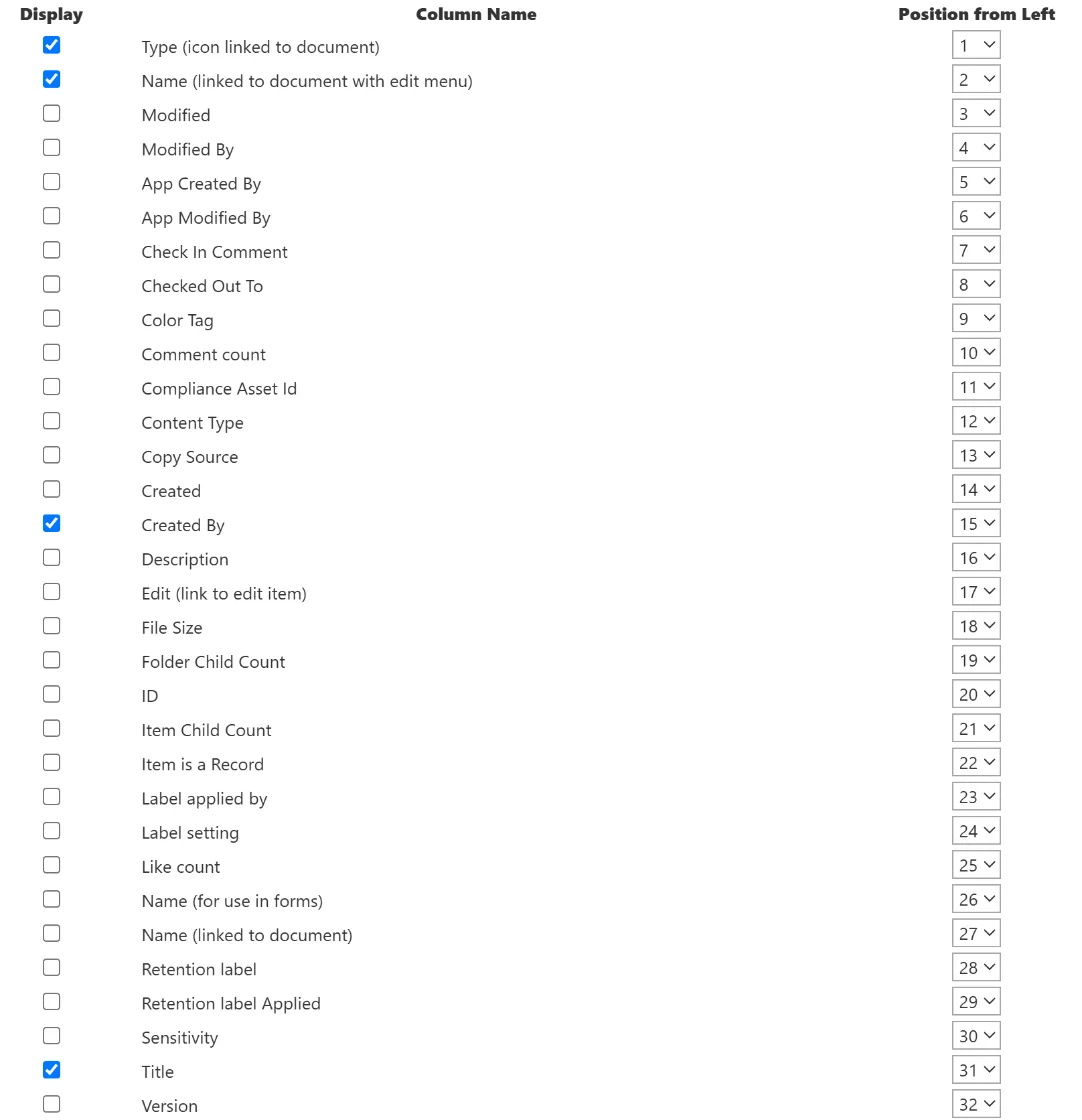
Created By matters more than it looks. The Edit Details button in the JSON compares the current user with the file’s creator, so it needs that column to appear.
3. Create the custom columns
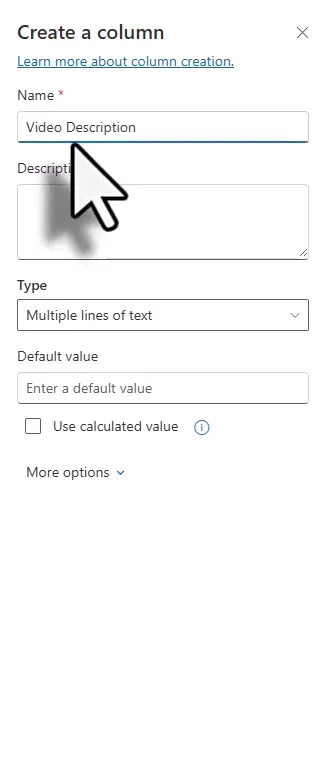
Use Add column in the library to create these five columns. Enter the names exactly as shown, because the JSON refers to them by name.
| Column name | Type | Settings |
|---|---|---|
| Video Description | Multiple lines of text | Defaults |
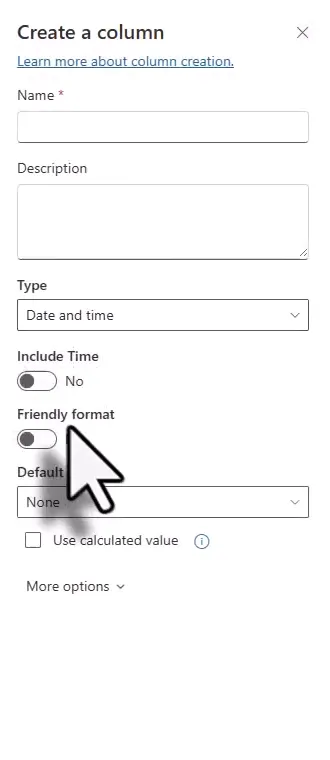
| Date | Date and time | Include Time set to No. Friendly format is optional |
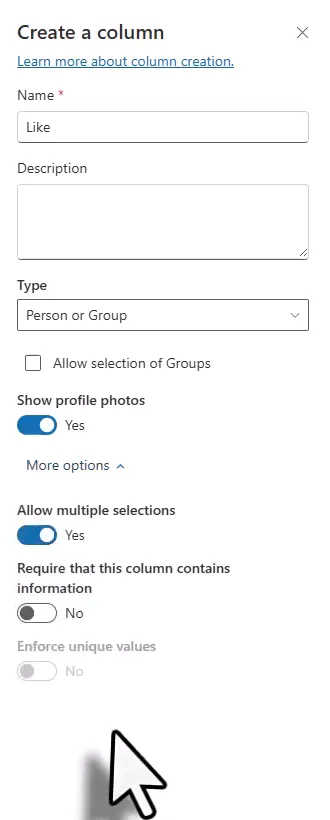
| Like | Person or Group | Show profile photos on, Allow multiple selections on, Allow selection of Groups off |
| Dislike | Person or Group | Same settings as Like |
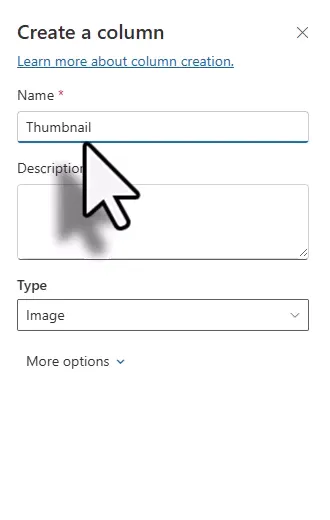
| Thumbnail | Image | Defaults |
Check the internal column names
The JSON uses each column’s internal name, not its display name. It expects VideoDescription, Date, Like, Dislike, and Thumbnail.
Spaces are where this usually goes wrong. Microsoft’s documentation notes that a name with a space can be stored as _x0020_, such as Video_x0020_Description, so confirm the name before you apply the JSON:
- Open Library settings > More library settings.
- Under Columns, select Video Description.
- Look at the end of the page address for the value after
Field=.
If the value is not VideoDescription, find every [$VideoDescription] in the JSON and replace it with your value, such as [$Video_x0020_Description]. Repeat the check for any other column if a value does not appear on the cards.
4. Add your videos and details
- Upload your videos to the library.
- Select Edit in grid view.
- Fill in Title, Video Description, and Date for each video. Leave Like and Dislike blank, since the buttons fill those in.
- Double-click the Thumbnail cell, select your image, and upload it.
- When you finish, exit grid view. Make sure your edits are saved.
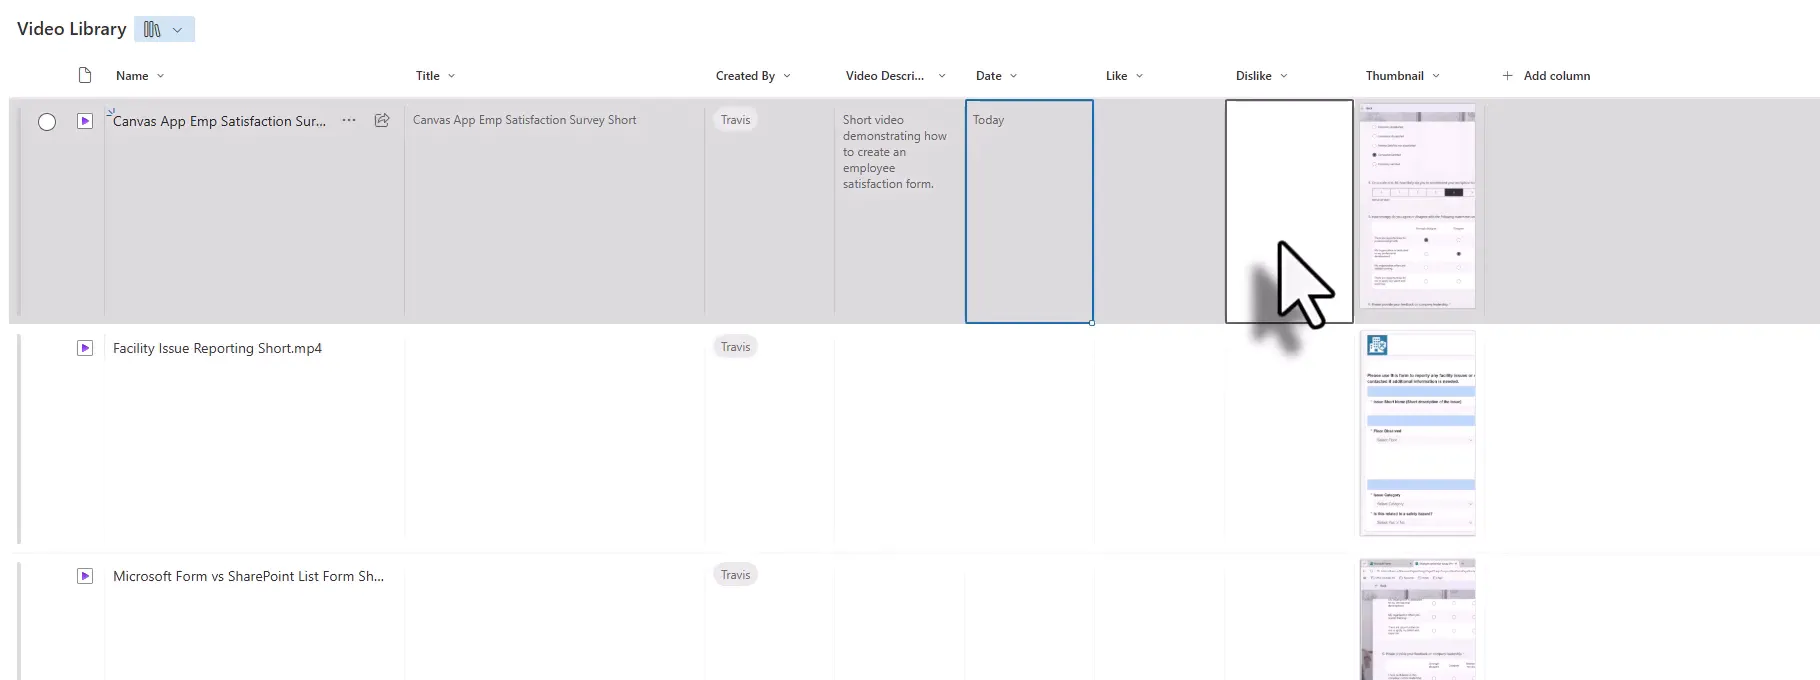
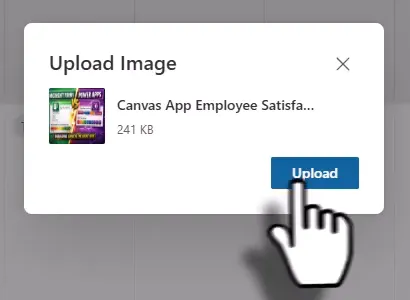
Until you upload an image, the Thumbnail column in the grid can show a generated preview of the file, but the card doesn’t use that preview. Upload an image for every video: a card without one shows a broken-image icon where the thumbnail would be.
5. Create the All Videos view
Keep the default All Documents view as your editing view, and create a second view for the cards.
- Open the view menu and select Create new view.
- Set View name to
All Videos. - Under Show as, select List.
- Select Make this a public view so that others can use it, then select Create.
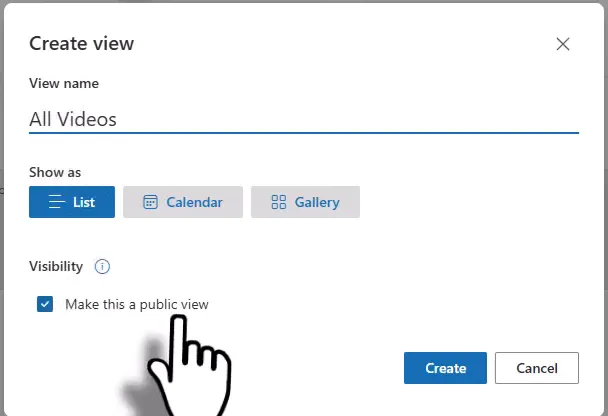
The new view starts with the same columns as the view you were on, so it looks identical until you format it. Confirm that every column from Steps 2 and 3 is in All Videos.
6. Apply the JSON
- With All Videos open, open the view menu and select Format current view.
- Select Advanced mode.
- Delete the starter text in the box.
- Open video-library-view.json, copy all of it, and paste it into the box.
- Select Preview to check the layout.
- Select Save, then refresh the page.
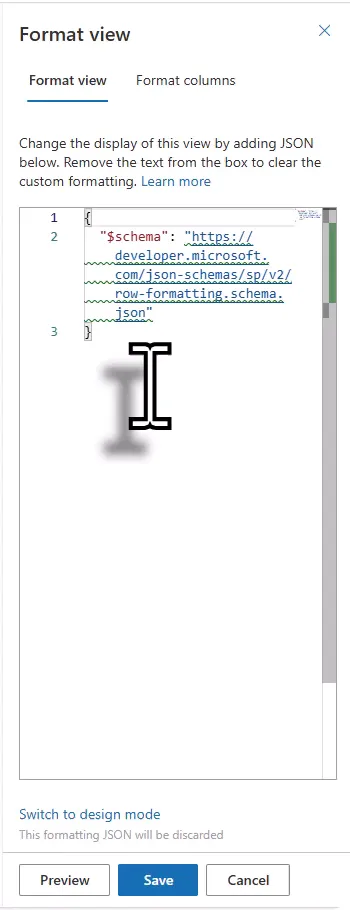
Thumbnails and the Edit Details button may be missing in the preview. Save and refresh the page before you judge the result.
7. Try the card buttons
Each button uses a built-in row action:
| Button | What it does | Who sees it |
|---|---|---|
| Watch Now | Opens the file, the same as selecting it in a normal view | Everyone who can open the view |
| Share | Opens the sharing dialog | Everyone who can open the view |
| Edit Details | Opens the file’s properties in edit mode | Only the person who created the file |
| Like / Dislike | Adds or removes your name from that column. Selecting one removes you from the other | Everyone who can open the view, but it saves only for people who can edit items |
Selecting Like or Dislike updates its counter and fills in the thumb icon:
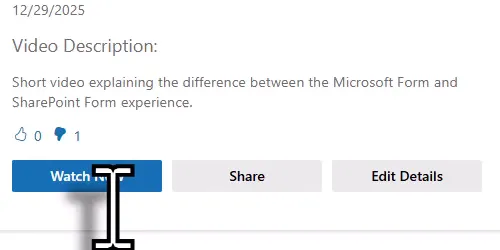
Title, date, and description can also be edited directly on the card by hovering over them, for people with edit permission.
Three things are worth knowing before you share the library:
- Like and Dislike change the file’s item. They use
setValueto update the item. Microsoft documents edit permission as a requirement for inline editing; treat Like and Dislike the same way and test with a read-only account. People with the Read level can view and download but not update items, so expect their selections not to be saved. - Think before you widen access for likes. Contribute or Edit would let viewers like videos, but it also lets them update and delete items and documents. They could change any video’s details, add or remove other people’s names in Like and Dislike, or replace and delete files. If viewers should only watch, keep them at Read and accept that only contributors can like. If everyone can edit, treat the counts as informal feedback, not a secure vote.
- Edit Details is limited to the creator. To show it to everyone with access, remove the
displayline from that button’sstylesection in the JSON. To edit other people’s videos without changing the JSON, use the All Documents view. Hiding the button doesn’t secure anything: anyone who can edit items can still edit the details from the file’s menu or another view.
Organize and secure your videos
Formatting is only the display layer, so the usual SharePoint options still apply:
- Group videos into playlists. Add a Choice column, assign each video a value, and create a filtered view for each value. Formatting is set per view, so apply the JSON to each new view.
- Limit access. A view does not restrict anyone from the underlying files. Use library or file permissions to control who can open a video.
- Choose a structure. A library per app, per audience, or per department all work. Separate sites can simplify permissions.
- Watch your storage. Videos are large. Each file has a 250 GB upload limit, and each site can hold up to 25 TB, but all of it counts against your organization’s total storage.
Troubleshooting
| Symptom | Likely cause | What to do |
|---|---|---|
| A value is missing from every card | The internal name differs, or the column is not in the view | Check the name after Field=, update the JSON, and confirm the column is in All Videos |
| Description is blank but filled in on the file | The column was stored as Video_x0020_Description | Replace [$VideoDescription] as described in Step 3 |
| Thumbnails are blank in the preview | The preview has not loaded them | Save the view and refresh the page |
| A card shows a broken-image icon, or an uploaded thumbnail doesn’t appear, after refreshing | No image uploaded, or the image link isn’t returned in your library | Upload an image. If an uploaded image still doesn’t show, change the image src as shown below |
| Edit Details is missing | You did not create that file, or Created By is not in the view | Add Created By to the view, or edit from All Documents |
| Like or Dislike does nothing | The user cannot edit the item | Check the user’s permission on the library |
| Column headers and checkboxes have disappeared | The JSON hides them on purpose | Switch to All Documents to select or sort files |
The JSON reads the Thumbnail column with getThumbnailImage, which is how Microsoft’s reference shows an image column in formatting. The reference also notes that, as of July 2024, only the fileName property of an image field has a value. The image’s serverRelativeUrl property isn’t documented, but it may still return the image’s address in your library. If an uploaded thumbnail doesn’t appear, try replacing the src line with this one:
"src": "[$Thumbnail.serverRelativeUrl]",If you’d rather not upload thumbnails, the same reference documents @thumbnail values, which show the file’s own preview in a document library, for example "src": "@thumbnail.500x281". Previews exist only for supported file types, so check them with your videos. This replaces the uploaded image on every card. The JSON in this tutorial doesn’t switch to the preview only for videos without an uploaded thumbnail.
To change the card’s look, edit the JSON. For example, the thumbnail’s width value sets the image size, and max-width stops it growing wider than the space available. If you change the width, change the two numbers in getThumbnailImage to match. Check the view at the screen sizes your viewers use.
Companion video
Video: How to Create a Netflix-Style Video Library in SharePoint Using JSON
If the player is blocked on your network, open the video on YouTube.
Need help applying this to your own setup? Read about consulting.