 Office Solutions Pro
Track page visits in Power Apps with a SharePoint access log
Record who opens each screen of a canvas app, and when, in a SharePoint list. Group the visits by session, and view them on an admin page inside the app.
An access log shows how people use an app: which screens they open, how often, and on which days. This walkthrough adds one to a project request app. Each time a screen appears, the app writes a row to a SharePoint list. Each row records the user, the screen, the date and a session ID that ties together everything one person did in one visit.
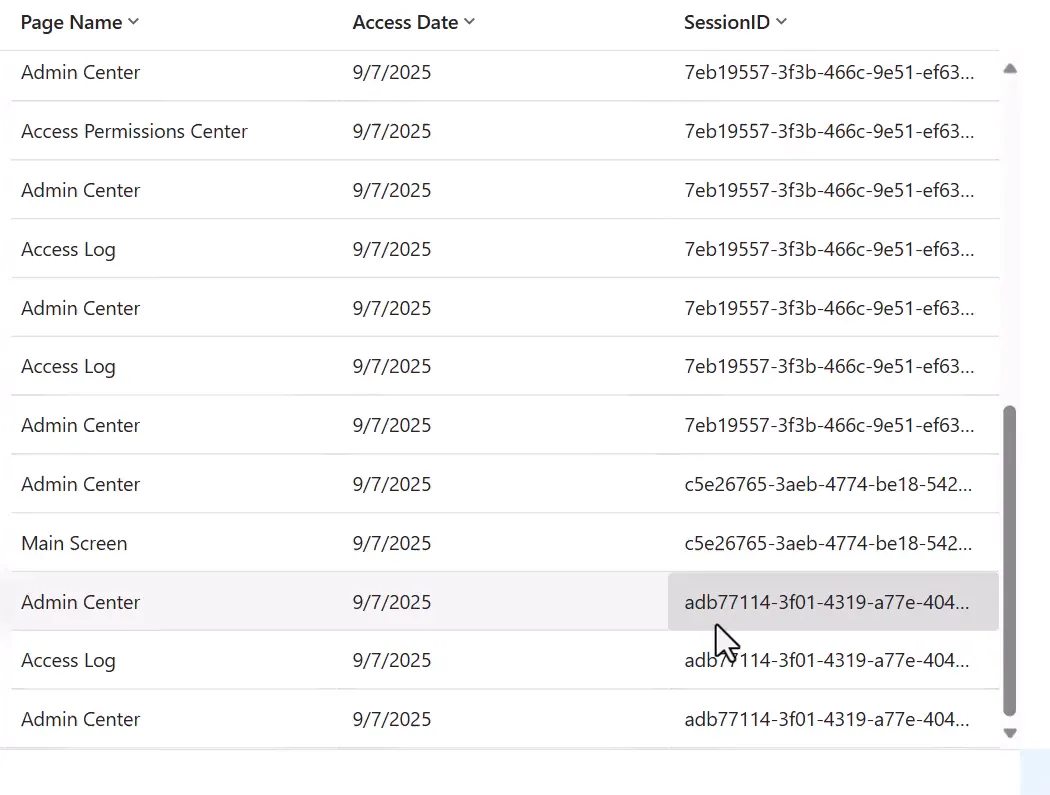
The log is then shown on an Access Log screen, reached from a small Admin Center screen.
Before you begin
- An app to log. The example is a canvas app built on SharePoint, with a main screen, a request form screen and an access permissions screen. Any canvas app works.
- Everyone who uses the app needs permission to add items to the log list. The app writes the rows as the signed-in user. See Who can see the log before you share the app.
1. Create the access log list
- In your SharePoint site, create a list named Project Request Intake Access Log. Clear Show in site navigation.
- Rename the Title column to User Name.
- Add these columns:
| Column | Type | Notes |
|---|---|---|
| User Email | Single line of text | |
| Page Name | Single line of text | |
| Access Date | Date and time | Turn Include Time off. Friendly format is optional |
| SessionID | Single line of text |
Create each column without a space, then rename it. For example, create UserEmail and then rename it to User Email. SharePoint keeps the name a column was created with as its internal name, and renaming changes only the name people see. A name without spaces avoids encoded characters wherever the internal name shows up.

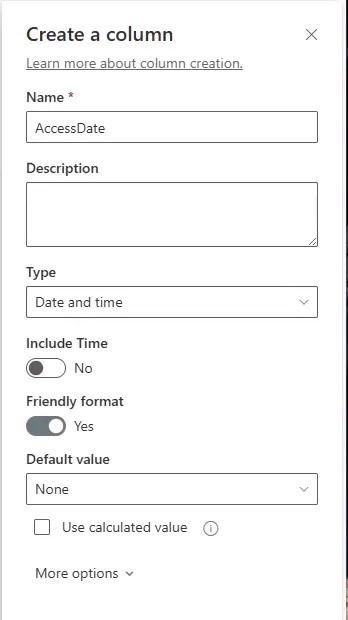
Why a date-only column? The list also has SharePoint’s own Created column, which you can keep using. A date-only Access Date is easier to filter and group by day. Filters that compare dates with =, < or > are delegated to SharePoint. So filtering a large log by date still works.
CountRows isn’t on Microsoft’s list of operations SharePoint can delegate. Counting a large log in the app can therefore stop at the app’s data row limit.
2. Add the list to the app
In Power Apps Studio, select Data > Add data > SharePoint. Choose your site, select Project Request Intake Access Log, and select Connect.
3. Log each screen visit
Add this to the OnVisible property of each screen you want to track. If OnVisible already has a formula, add a semicolon at the end of it and paste this after it.
If(IsBlank(gblSessionID), Set(gblSessionID, GUID()));Patch( 'Project Request Intake Access Log', Defaults('Project Request Intake Access Log'), { Title: User().FullName, 'User Email': User().Email, 'Page Name': App.ActiveScreen.Name, 'Access Date': Today(), SessionID: gblSessionID })What each part does:
- GUID() creates a new unique ID. The
If(IsBlank(...))check creates one only the first time a screen opens. Every later visit in the same session reuses it, so all rows from one visit share a session ID. It’s the app’s own identifier, not a Microsoft session ID. Closing and reopening the app starts a new session. - Defaults with Patch creates a new row.
- Title is the internal name of the column you renamed to User Name.
- User().Email returns the user’s user principal name (UPN), not their SMTP email address. If sign-in names in your organization differ from email addresses, User Email holds the sign-in name.
- App.ActiveScreen.Name returns the name of the screen that’s showing, so the same formula works on every screen. To record a friendlier name, type it instead, for example
'Page Name': "Request Intake Form". - Today() records the date without a time, to match the column.
Why not create the session ID in App.OnStart?
A common setup creates the session ID in App.OnStart with Set(gblSessionID, GUID()). It also reads user name and email variables that OnStart sets, like the ones in the separate article on controlling what users see with a SharePoint role list.
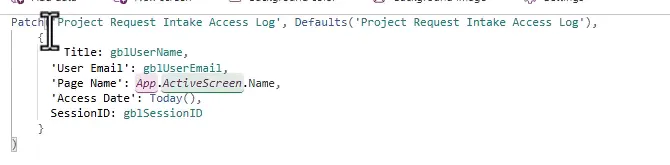
That can leave the first row incomplete. With the nonblocking OnStart rule, which is the default, OnStart runs at the same time as other app rules. The first screen can appear, and run its OnVisible, before OnStart has set those variables. Its log row could then have a blank session ID, user name or email.
The formula above avoids that. It creates the session ID where it’s first needed and reads the user from User() directly.
If you keep a session ID line in OnStart as well, remove it. Otherwise OnStart can replace the ID after the first screen has already logged with a different one.
4. Choose where to log
OnVisible runs every time the screen appears, including when someone comes back to it.
- Logging in each screen’s OnVisible, as above, also catches people who open a screen directly from a link. Because each screen logs itself, you don’t need a separate entry for opening the app.
- Logging in App.OnStart as well adds a second row every time the app opens.
- Repeat visits: if your app sends people back and forth between screens to finish one task, each return adds another row. If you only want one row per task, put the Patch in the OnSelect of the buttons that move people between screens, instead of in OnVisible.
5. Build the Access Log screen
- Duplicate an existing screen that has your header, and rename it Access Log. Change the header text, and delete the controls in the main container.
- Rename any copied controls that end in
_1. App.ActiveScreen.Name records the screen’s name, so rename the screen as well, or it will be logged as something likeAccess Log_1. - In the main container, insert a Table and set its Items to
'Project Request Intake Access Log'. - Set Height to
Parent.Heightand Width toParent.Width, and name the tabletblAccessLog. - Select Edit next to Fields. Show Title, User Email, Page Name, Access Date and SessionID, and remove fields you don’t need, such as Created By.
- Select the Title field, and change its header text to User Name.
- Set Enable sorting to Yes. The example also turns on Enable multi-select.
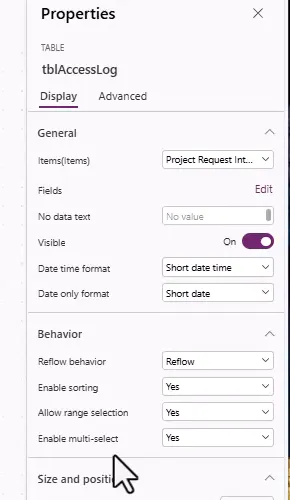
Consider the Data Grid instead. Microsoft now labels the Table control pre-release. It lists only Dataverse tables and collections as supported sources, and it recommends the Data Grid control for tabular data. The Table worked with this SharePoint list, but the Data Grid is the safer long-term choice. In the Data Grid, sorting is on by default, and SelectMultiple turns on multiple selection. If you use the Data Grid, set Pagination to Pagination.Auto. With the default, Pagination.None, it loads rows only up to the app’s data row limit.
Show recent rows first. The log grows quickly. To show the last 30 days, newest first, set Items to:
Sort( Filter( 'Project Request Intake Access Log', 'Access Date' >= DateAdd(Today(), -30) ), Created, SortOrder.Descending)The sort uses SharePoint’s Created column, which records when each row was added. Access Date has no time, so sorting on it doesn’t put a day’s visits in time order.
Date comparisons, Filter and Sort on a date column are all delegable to SharePoint, so this filter runs in SharePoint and doesn’t stop at the app’s row limit.
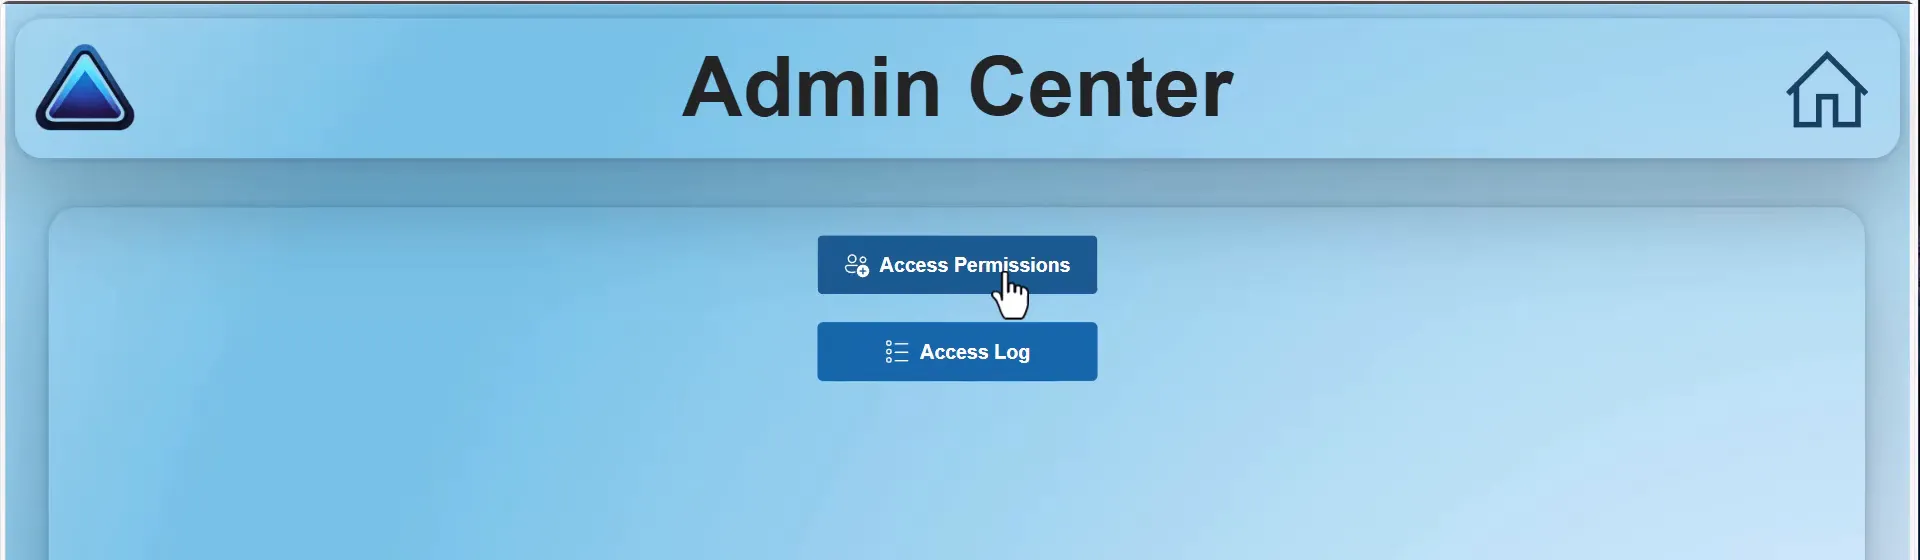
6. Add an Admin Center screen
- Duplicate Access Log, rename the copy Admin Center, change its header, and delete the table.
- In the main container, set Direction to vertical, Gap to 20 and top padding to 20, and center the contents.
- Add a Button with Text
"Access Permissions", a person icon such as PeopleAdd, Width 200 and Height 42. Set its OnSelect:
Navigate('Access Permissions Center', ScreenTransition.CoverRight)If your app has no Access Permissions Center screen, leave out this button.
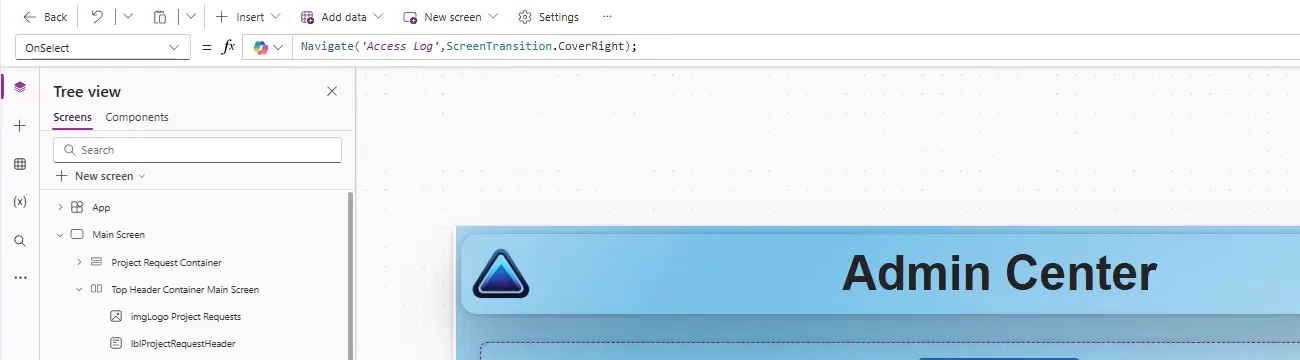
- Copy the button for Access Log. Change its text and icon, and set its OnSelect:
Navigate('Access Log', ScreenTransition.CoverRight)- Set each button’s AccessibleLabel under Advanced, for example
"Access Log".
Because Admin Center was copied from Access Log, its OnVisible already logs visits.
Finally, connect the screens:
- On the main screen, change the admin icon’s OnSelect (the icon that opens your admin screens, if you added one) to
Navigate('Admin Center', ScreenTransition.Fade), and its AccessibleLabel to"Admin Center". - On Access Log and Access Permissions Center, point the header icon back to Admin Center, so people return to the admin tools.
If only admins should see that icon, set its Visible to an admin check, such as the IsUserAdmin variable from the separate article on controlling what users see with a SharePoint role list.
Who can see the log
Patch runs as the signed-in user, so every app user needs permission to add items to the log list. That permission also lets them open the list in SharePoint.
Hiding the list from site navigation and hiding the Admin Center icon only change navigation. They don’t stop anyone from opening the list.
To limit what ordinary users can see, open the list’s Settings > Advanced settings. Under Item-level permissions, set Read access to Read items that were created by the user, and Create and Edit access to Create items and edit items that were created by the user. Let SharePoint list users read and edit their own items explains these settings and who they don’t apply to.
According to a Microsoft Q&A answer, these settings apply to people with Contribute or Edit access. People with Design or higher, such as site owners, still see every item, so admins can still see the whole log. Microsoft’s documentation doesn’t describe this behavior, so check it with a test account before you rely on it.
These settings don’t make the log tamper-proof. The Contribute and Edit permission levels include editing and deleting items, so people can still change or remove the rows they’re allowed to edit, such as their own. Treat the log as a record of app use, not as audit evidence. Site members have Edit by default, and Edit also lets people edit and delete lists, including the log list itself. Contribute is enough to add rows, so give app users Contribute on the log list if you can.
Keep the log manageable
Every screen visit adds a row. In the example, just building the app added about a dozen rows. Across many users and days, the list can reach thousands of rows quickly.
- Show only recent rows in the app, as in Step 5.
- Decide how long to keep entries, for example two or three months, and delete older rows on a schedule.
- For charts and trends over a long history, report on the list in Power BI instead of in the app.
Troubleshooting
| Symptom | Likely cause | What to do |
|---|---|---|
| The first row of a session has a blank SessionID, user name or email | OnStart hadn’t finished when the first screen logged | Use the Step 3 formula, which doesn’t depend on OnStart |
| Rows in one visit have two different session IDs | The session ID is also set in OnStart | Remove the OnStart line |
| Two rows every time the app opens | Logging in both OnStart and the first screen | Log in one place only |
| Several rows for one task | OnVisible runs each time someone returns to a screen | Log in the navigation buttons’ OnSelect instead |
A page name like Access Log_1 | A duplicated screen wasn’t renamed | Rename the screen, or type the page name in the formula |
| Some users get an error when a screen opens | They can’t add items to the log list | Give them permission to add items |
| The table doesn’t show older rows, or a count is wrong | Delegation or the data row limit | Filter by Access Date in Items, and count in SharePoint or Power BI |
Companion video
Video: Power Apps Access Log: Built from Scratch! Track Screen Visits with SharePoint Online + Canvas App
If the player is blocked on your network, open the video on YouTube.
Need help applying this to your own setup? Read about consulting.