 Office Solutions Pro
Show, hide, require and clear fields with Dataverse business rules
Use a Dataverse business rule to show a group of fields only when they apply, make them required while they're showing, and clear them when they no longer apply, without writing code.
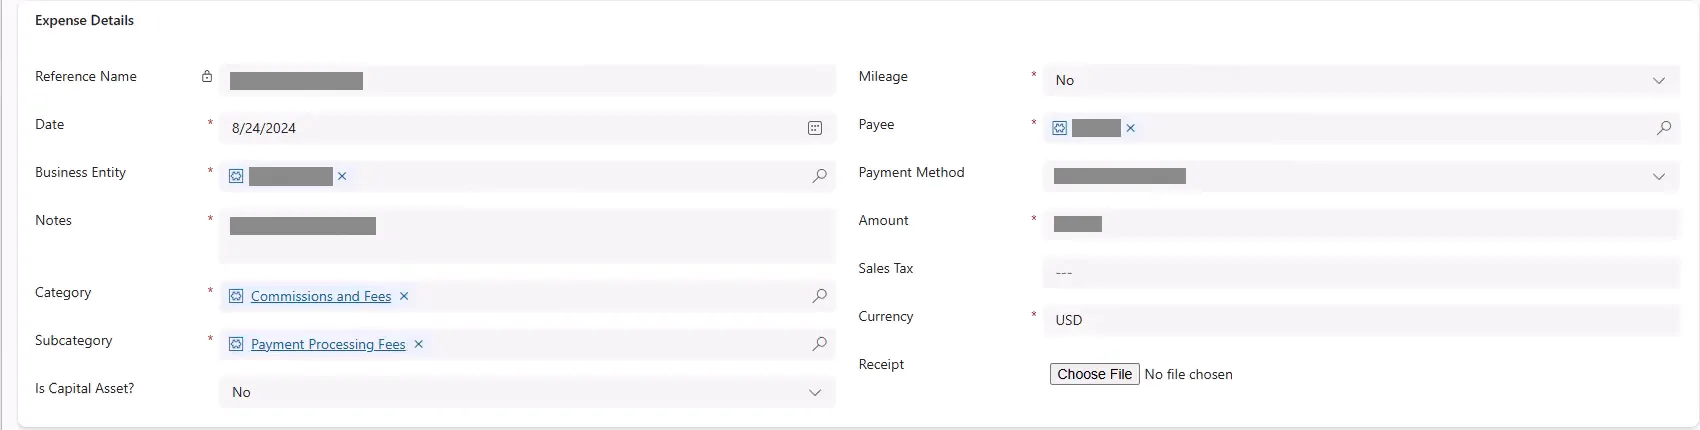
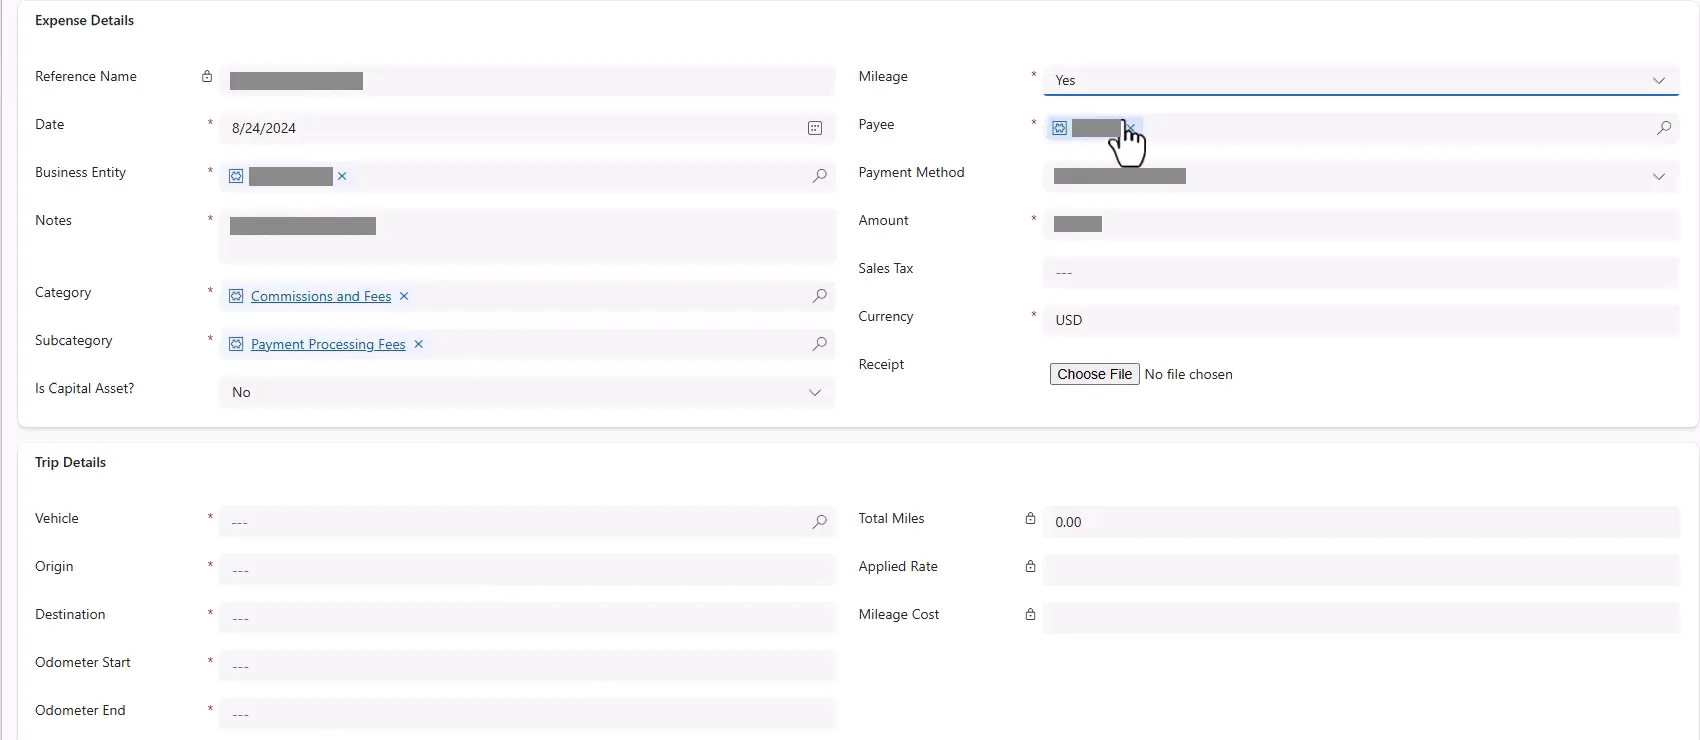
Forms are easier to fill in when they only show what matters. In this example, an expense form in a model-driven app has a Mileage field. When it’s No, the trip fields stay hidden. When someone sets it to Yes, a Trip Details section appears with vehicle, origin, destination and odometer fields, and those fields become required. If they switch back to No, the fields disappear and anything typed in them is cleared.
One business rule on the Expense table does all of this.
Before you begin
- A Dataverse table and a model-driven app form. The example uses an Expense table with a Mileage Yes/No field and these trip fields: Vehicle, Origin, Destination, Odometer Start and Odometer End.
- Every field the rule uses must be on the form. A business rule might not run if a field it refers to isn’t on the form.
- Leave the trip fields optional on the table. The rule makes them required only when Mileage is Yes.
- Permission to customize the table. You need a security role that lets you edit the table, such as System Customizer or System Administrator, and the table must be in a solution you can edit. Privileges required for customization
- App users with Power Apps premium use rights for the model-driven app. Model-driven app licensing
Where business rules work
Business rules belong to a table, and Microsoft splits their actions into two groups:
| Action | Where it applies |
|---|---|
| Set or clear a field value, set a default value, show an error message | Forms, and also the server when the scope is Entity |
| Show or hide a field, make it required or optional, lock or unlock it, add a recommendation | Model-driven app forms only |
Source: Create a business rule in Microsoft Dataverse.
So in this rule, hiding the trip fields and making them required only affects forms. Clearing the values, with Entity scope, also runs on the server, for example when a record is saved some other way. Canvas apps can’t use the show and hide actions at all.
1. Create the rule
- In Power Apps, open your solution and select the Expense table. Under Customizations, select Business rules.
- Select Add business rule. The designer opens with one condition already in place.
- Give the rule a name, such as Mileage Visibility, and a description that covers everything it does. For example: Shows, requires and clears the trip fields based on Mileage.
- Set Scope to Entity, so the rule applies to every form of the table, and its value-clearing also runs on the server.

The designer is still the classic experience. It can take a moment to open.
2. Set the condition
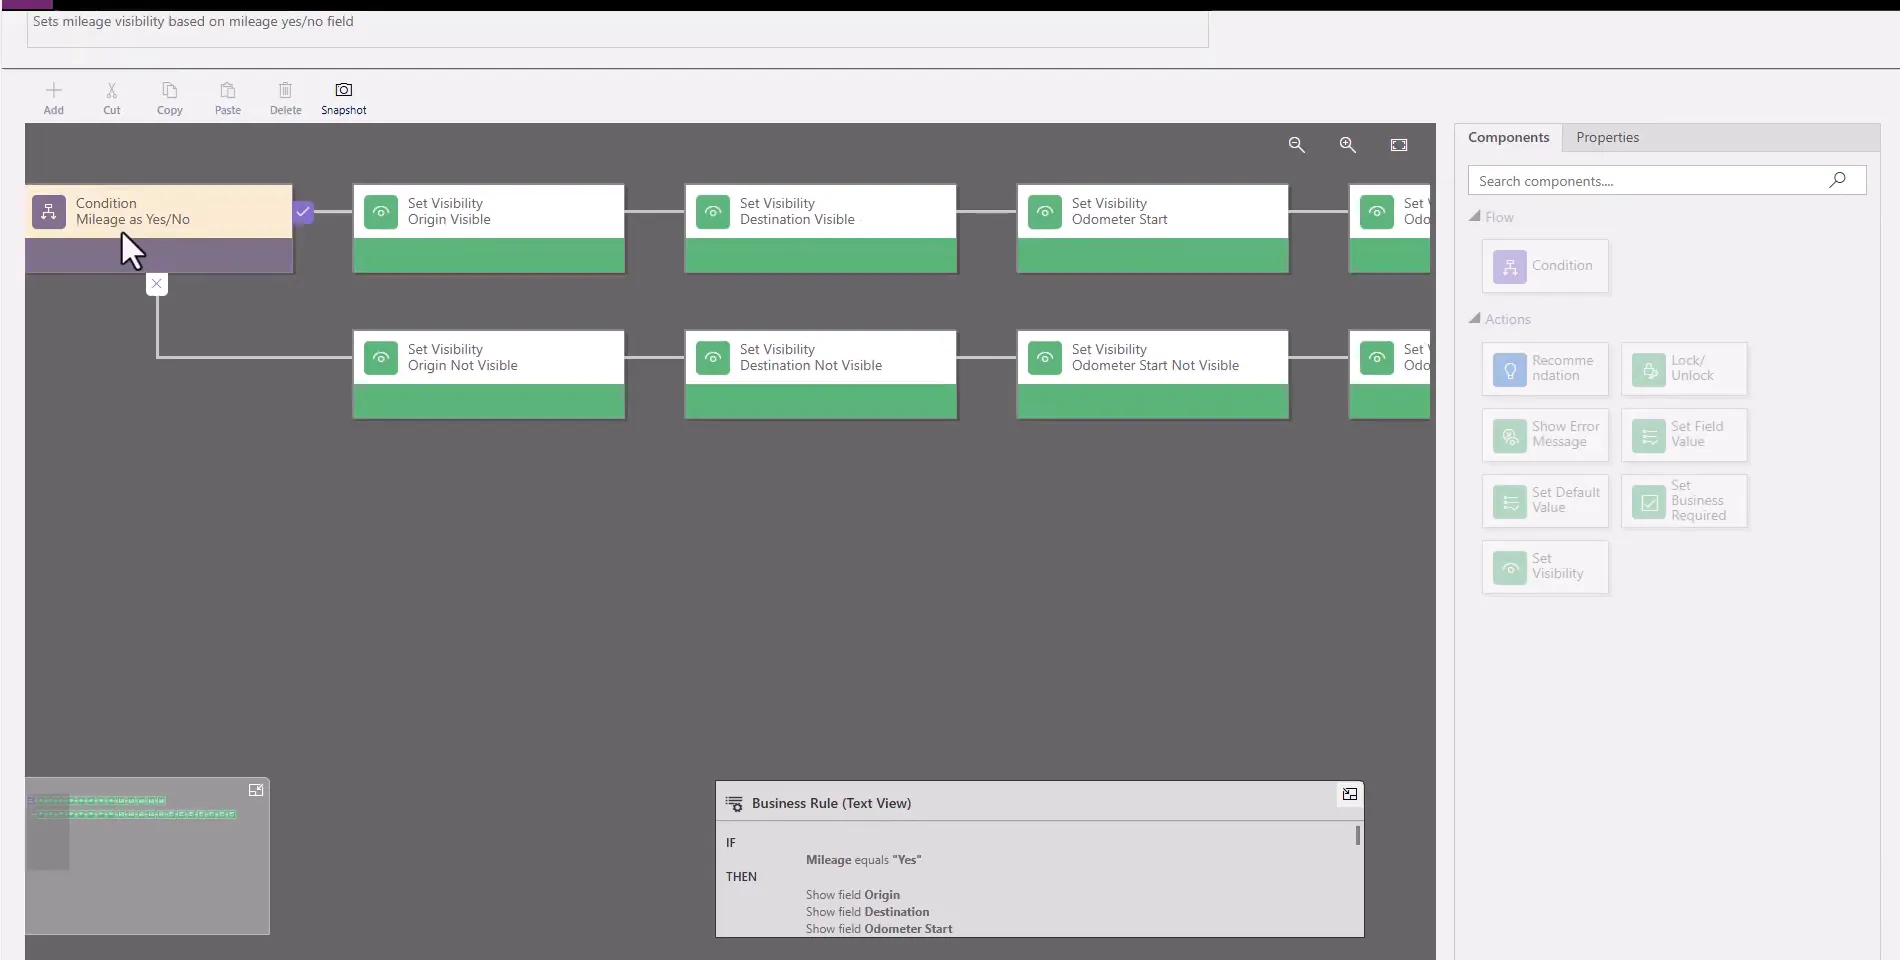
Select the condition, and on the Properties tab set:
- Display Name: Mileage as Yes/No
- Field: Mileage
- Operator: Equals
- Type: Value
- Value: Yes
Select Apply.
The actions you add on the check-mark side run when Mileage is Yes. The actions on the x side run when it isn’t.
3. Add the Yes actions
Drag actions from the Components tab onto the plus sign after the condition’s check mark. Select Apply after setting each one.
- Set Visibility for each trip field: choose the field and set it to Yes. Give each action a name that says what it does, such as Origin Visible. The names make a long rule easy to read later.
- Set Business Required for each trip field that people must fill in: choose the field and select Business Required.

In the example, the read-only result fields (Total Miles, Applied Rate and Mileage Cost) are shown but not required. They’re filled in for the user: Total Miles subtracts Odometer Start from Odometer End, and an automation looks up the mileage rate for the expense’s year. That logic sits outside the business rule.
4. Add the No actions
The No side undoes everything on the Yes side. This handles someone who chooses Yes, fills in some trip fields, and then changes back to No. Add these on the plus sign after the condition’s x:
- Set Visibility for each trip field, set to No.
- Set Business Required for each trip field, set to Not Business Required. Otherwise a hidden field could still block saving because it’s required.
- Set Field Value for each trip field you want emptied, with the value set to clear the field. Without this step, values typed before switching back to No are saved with the record, even though they’re hidden.

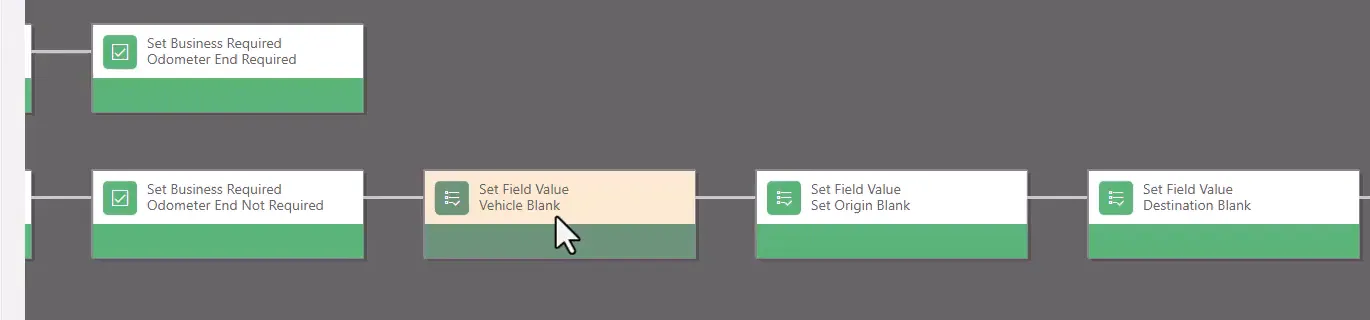
Keep the Yes and No actions in the same order, field by field, so you can check that every field has a matching action on both sides.
5. Validate, save and activate
- Select Validate to check the rule, then Save.
- Activate the rule. Microsoft’s instructions say to activate it from the list of business rules, not from the designer.
To change an active rule, deactivate it first. An active rule opens read-only.
6. Test it
Open a record that has Mileage set to No. The trip fields stay hidden, though they may flash briefly while the form loads. Set Mileage to Yes: the Trip Details section appears and its fields are marked required. Fill one in, switch back to No, and save. When you reopen the record and set Mileage to Yes, the field is empty.
Business rules run in the form when it opens and when a field changes. Changing a rule doesn’t update existing records.
Troubleshooting
| Symptom | Likely cause | What to do |
|---|---|---|
| The rule does nothing on the form | A field it uses isn’t on the form, or the rule isn’t active | Add the field to the form, then activate the rule |
| The rule can’t be edited | It’s active | Deactivate it, edit it, then activate it again |
| Fields still show or hide wrongly in a canvas app | Show and hide actions aren’t available in canvas apps | Use control Visible formulas in the canvas app |
| A hidden field blocks saving as required | The No branch doesn’t reset the requirement | Add Set Business Required set to Not Business Required |
| Old trip values remain after switching to No | The No branch doesn’t clear them | Add Set Field Value actions that clear each field |
| Existing records weren’t changed by the rule | Rules run when a record is opened and edited | Update existing records separately if needed |
| The rule doesn’t apply to a multi-select choice, file or language column | Those column types aren’t supported | Use a different column type or other logic |
Companion video
Video: Power Apps Business Rules Explained | Hide, Show & Clear Fields Dynamically
If the player is blocked on your network, open the video on YouTube.
Need help applying this to your own setup? Read about consulting.